 |
| Classic piece from 2009 |
Relax, you still have two weeks (minus one day) until March 30 when you will be bringing your piece to Maude Kerns Art Center and declaring yourself to be a Jell-O Artist.
 |
| Easter is usually a good back-up theme |
 |
| Book made of dried gelatin sheets |
Try getting a box of clear Knox brand, which contains 32 envelopes, each containing about 1/4 ounce of gelatin. Then add some extra to the Jell-O brand, to make the traditional Jigglers-type edible stuff, a little firmer than usual, still retaining a bit of jiggle, but more stable at room temperature.
Try a few things, like pouring it into non-traditional molds, anything that will hold liquid and allow you to pry the firm gelatin out. The firmer stuff is easy to get out of molds, holds its shape, and will allow some shaping techniques, like carving.
 |
| Some advanced technique and great use of props |
 |
| Closeup of a dried piece almost ten years old |
One thing that differs with the clear gelatin is that you want to dissolve it by stirring it into cold water, not hot. Let it bloom in the water for about ten minutes, and then melt the stuff in the microwave or on the stovetop. Skim off any foam and throw it away (or use it to decorate your sculpture.) You can remelt the gelatin numerous times until it gets moldy or too stiff.
Wet gelatin will last a few days, so you will want to wait until the week of the show to make your final project, but that still gives you a week to experiment.
 |
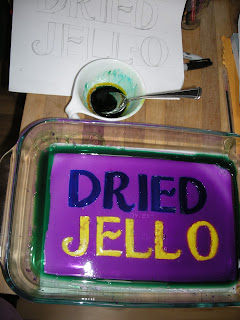
| Looked like a good plan... |
I work in mostly dried gelatin at this point, because I like the illusion of control and the permanence of the results. Once dried it resembles plastic and lasts for decades. I fill a quart canning jar half full of water and add 6 ounces of gelatin. That makes a very stiff formula that I pour in thin layers in pie plates and cake pans for a glossy surface. Then as it dries I peel it out, tear and cut it into shapes, and turn and tend it for a day or two until it gets dry. There are various stages of flexibility in the process, and again, you can wet it and remelt it and start over.
 |
| You can't predict the results! |
I glue my dry pieces together with molten gelatin. It's very strong and I have found a million ways to use it as an art material.
But I advise starting with the jiggly kind. It's fun, it's easy, it will clean up off your floor and counters eventually, and let me testify that playing with art, particularly something as beautiful and delightful as Jell-O Art, is highly liberating.
Let your Jell-O Artist out!
No comments:
Post a Comment